Not every track is perfect straight out of the download. Maybe the intro is too long. Maybe there’s a radio DJ talking over the first 20 seconds. Maybe you want a cleaner mix-out point than the album version provides. Custom DJ edits let you fix all of this — and Audacity, a completely free audio editor, is all you need to do it. Here’s the step-by-step tutorial.
What You’ll Need
Download from audacityteam.org — available for Windows, Mac, and Linux. It’s the most widely used free audio editor in the world and handles everything in this tutorial.
FreeWindows / Mac / LinuxYou’ll also need:
- The track you want to edit — MP3 or WAV file from your record pool
- Headphones for precise listening
- 30–60 minutes the first time (gets significantly faster with practice)
What Types of DJ Edits Can You Make?
- Clean intro edit — add a beatonly intro for smooth mix-ins (most common and useful)
- Tighter outro — cut a long fade and create a clean mix-out point
- Remove dead air — cut silence or noise at the start or end of a file
- Create a radio edit — shorten a 6-minute track to 3.5 minutes for specific events
- Fix levels — normalize a quiet track so it hits at the right volume
- Remove unwanted elements — cut a DJ drop, radio tag, or intro talking
Tutorial 1: Creating a Clean Intro Edit
The most useful DJ edit is a clean intro — a version of the track that starts with 8 or 16 bars of beat-only music before the vocals and melody kick in. This gives you room to mix into the track smoothly without incoming vocals clashing with the outgoing track.
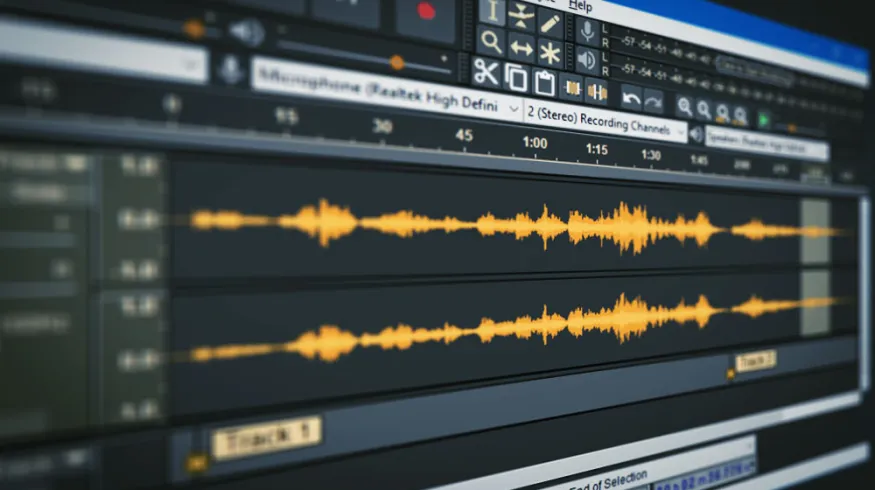
Go to File → Import → Audio and select your MP3 or WAV file. The waveform appears as a blue track in the timeline. You’re now looking at the full audio of the track visually.
Press Play and listen carefully to the first 60 seconds. Identify: where does the beat start? Where do the vocals or main melody first appear? This is your target — you want to work in the section before the vocals come in.
Look for a breakdown, outro, or instrumental bridge later in the track — a section that’s drums and music only with no vocals. Select 8 or 16 bars of this section by clicking and dragging. Watch the waveform for sections without tall vocal peaks (those show as larger, irregular spikes). Press Ctrl+C to copy.
Click at the very start of the waveform (position 0:00). Go to Edit → Paste. The instrumental section is now inserted as a new intro before the original track begins. The track is now longer by the length of your pasted section.
Listen back to the transition point — where your new intro meets the original track start. If you hear a click or pop at the edit point, zoom in tightly on that exact spot and apply a short fade out/fade in across a few milliseconds: Effect → Fades → Fade Out on the last 0.1 seconds of the intro, and Fade In on the first 0.1 seconds of the original. This eliminates click artifacts.
Go to Edit → Select All (Ctrl+A), then Effect → Volume and Compression → Normalize. Set to -1.0 dB and click OK. This brings the file up to a consistent loud level without clipping, ensuring it hits at the right volume in your DJ software.
Go to File → Export → Export as MP3. Name it with [Intro Edit] in the filename: Artist - Title [Intro Edit].mp3. Set quality to 320kbps. Save to your DJ music Inbox folder for tagging and importing.
Tutorial 2: Creating a Clean Outro (Mix-Out Point)
Many tracks have long, untidy fades that are hard to mix out of cleanly. Here’s how to create a tight outro that gives you a reliable exit point every time.
Listen to the end of the track and identify the last strong beat before the fade begins. This is your cut point — the place you’ll exit to the next track. Look for it on the waveform too: you’ll see the audio getting gradually lower and more sparse as the fade starts.
Click precisely at your cut point on the waveform. Press Shift+End to select everything from that point to the end of the track.
Option A — Short fade: Go to Effect → Fades → Fade Out. This creates a smooth fade from your cut point to silence. For a tighter edit, make your selection just 4–8 bars long before applying.
Option B — Hard cut: With the section after your cut point selected, simply press Delete. This creates a clean, hard ending right on the beat. Zoom in to make sure you’re cutting exactly on the beat — off by even a fraction sounds wrong.
Same process as above — File → Export → Export as MP3 at 320kbps. Name with [Outro Edit]: Artist - Title [Outro Edit].mp3.
Tutorial 3: Removing a Radio DJ Tag or Talking Intro
Downloaded tracks occasionally have a radio presenter talking over the first 10–15 seconds, or a DJ drop embedded in the intro. Here’s how to remove it cleanly.
Play the track and note exactly where the unwanted talking ends and the clean music begins. Use the waveform to help — talking and DJ drops appear as irregular audio spikes in otherwise rhythmic waveform patterns.
Click and drag to select the exact region containing the unwanted audio. Go to Effect → Special → Silence Audio. This replaces the selected region with silence rather than deleting it — preserving the timing of the rest of the track. Then apply a very short fade in at the start of the music to eliminate any abrupt entry.
If the talking covers the entire intro and you’d prefer to cut straight to the music, select everything before the music starts and press Delete. Then paste an instrumental section in front as described in Tutorial 1 above.
Pro Tips for Better Edits
- Edit in WAV, export as MP3 — if your source file is WAV, do all editing in WAV format and only convert to MP3 at the final export step. Re-converting MP3 to MP3 degrades quality slightly each time.
- Zoom in for precision — editing on a zoomed-out waveform leads to imprecise cuts. Always zoom in to individual beats when setting cut points. Use
Ctrl+Scrollto zoom. - Use headphones, not speakers — fine edits require hearing tiny artifacts and clicks that may not be audible on speakers. Always monitor on headphones during the edit phase.
- Save the Audacity project file — before exporting, save the project (
File → Save Project). This preserves all your edit points so you can return and adjust without starting over. - Batch similar edits together — if you’re creating intro edits for 10 tracks in the same BPM range, do them all in one session. Your ear gets calibrated to the genre and the workflow becomes fast.
- Name consistently — always add the edit type in brackets: [Intro Edit], [Outro Edit], [Clean Edit], [Short Edit]. This keeps your library organized and helps DJ software display versions correctly.
When to Use Other Tools
For most DJ editing tasks — intros, outros, level fixing, dead air removal — Audacity is all you need. Here’s when to upgrade:
Professional-grade multitrack editor. Better noise reduction, spectral repair, and batch processing. Worth it if you’re editing tracks regularly for radio or broadcast use.
PaidProfessional GradeBatch ProcessingFor creating full remixes, mashups, and redrums from scratch. Steep learning curve but unlimited creative possibilities for original DJ edits.
PaidRemixes & MashupsFull ProductionApple’s free DAW included on every Mac. Good for simple edits and level adjustments. Easier to learn than Audacity for Mac users already familiar with Apple software.
FreeMac OnlyBeginner FriendlyThe industry standard for audio repair. Remove crowd noise, fix clipping, eliminate hiss, repair damaged recordings. Use it for cleaning up poorly recorded tracks or live recordings.
PaidAudio RepairNoise RemovalFrequently Asked Questions
Can I use Audacity to create a cappellas or instrumentals?
Not from a standard stereo file — Audacity can’t separate vocals from music on a regular MP3. For that, you need a stem separation tool like the one built into djay Pro AI, Virtual DJ’s AI features, or a dedicated tool like Lalal.ai. Audacity is for editing the full track, not separating elements.
Will editing a 320kbps MP3 in Audacity degrade the quality?
Very slightly, due to re-encoding when you export back to MP3. The difference is inaudible at 320kbps in a DJ context. To avoid any quality loss, work with WAV files and only export to MP3 as the final step.
How do I match the BPM precisely when pasting an instrumental intro?
If you’re copying from the same track, the BPM is identical and the timing will be mathematically correct. To be safe, always cut at a downbeat (the “1” of a 4-beat bar) — this ensures the pasted section flows naturally into the original track.
Can I do this on my phone?
Not with Audacity, which is desktop-only. On iOS, GarageBand is a capable alternative for basic edits. On Android, AudioLab is a solid free option. However, precise DJ editing on a small screen is difficult — use a laptop whenever possible.
// Start With Great Source Material
Edit from High-Quality Downloads
Custom edits are only as good as the source track. Starting from a 320kbps download from MyMP3Pool gives you the cleanest possible file to work with — no compression artifacts to fight against.
Visit MyMP3Pool → ⓘ Affiliate link — we may earn a commission at no extra cost to youThe Best DJ Record Pool We've Tested
After independently reviewing every major record pool, mp3poolonline.com consistently comes out on top for catalog size, audio quality, new release speed, and price.
Visit mp3poolonline.com →ⓘ Affiliate link — we may earn a commission at no extra cost to you